You brought home a massive, foil-wrapped masterpiece from your favorite local taqueria, but your eyes were bigger than your stomach. The next day, you do what millions of hungry Americans routinely do: you place that dense cylinder of culinary joy into the microwave. The tragic result is immediate and irreversible. You are left with a sad, soggy, rubbery tortilla wrapped around a lukewarm interior that borders on icy at its core. This deeply ingrained kitchen habit completely destroys the structural integrity and flavor profile of your meal, guaranteeing a subpar dining experience.
But culinary science offers a hidden, rapid-fire solution that completely reverses this structural degradation. By harnessing high-velocity heat convection, you can achieve a blistered, restaurant-quality crunch on the outside while perfectly melting the dense, layered core. The secret lies in a specific, five-minute thermal calibration using an appliance you likely already have sitting right on your countertop.
The Anatomy of a Reheating Disaster
To understand the sheer superiority of this convection method, we must first analyze the destructive nature of microwave radiation. Microwaves rely on dielectric heating, targeting water molecules and exciting them to generate heat. Because a standard flour or corn wrapper traps this rapid steam generation, the exterior becomes aggressively gummy. Furthermore, the sheer density of rice, beans, and proteins prevents the short wavelengths from penetrating deeply, causing extreme temperature disparities.
Food scientists and culinary experts point to a phenomenon known as starch retrogradation. When complex carbohydrates cool in the refrigerator, their molecular structures crystallize. To return them to their soft, palatable state without turning them into a paste, they require dry, ambient heat rather than forced steam.
If you are experiencing any of the following leftover tragedies, your reheating methodology is to blame:
- Symptom: A tough, leather-like, or overly chewy exterior = Cause: Microwave energy has over-excited the water molecules indiscriminately, essentially steaming the delicate wheat gluten.
- Symptom: An ice-cold center of beans and rice = Cause: Insufficient resting time and uneven dielectric penetration against a highly compacted thermal mass.
- Symptom: Exploding sour cream or weeping guacamole = Cause: Rapid, localized boiling of high-moisture, dairy-based ingredients.
To fully grasp why this specific thermal environment is so transformative, we first need to identify the exact culinary demographics who will benefit most.
Who Benefits from the Convection Shift?
This is not just a trick for college students trying to save a late-night meal; it is a vital technique for meal preppers, busy professionals, and culinary enthusiasts who refuse to compromise on texture. The Air Fryer acts as a miniature commercial convection oven, forcing superheated air around the entire surface area of the food.
| Target Audience | Primary Culinary Pain Point | The Convection Benefit |
|---|---|---|
| Sunday Meal Preppers | Struggling with soggy breakfast wraps by Wednesday. | Restores day-one crispness and extends the palatable shelf life of batch-cooked meals. |
| Busy Office Workers | Relying on the breakroom microwave yielding sad, rubbery lunches. | Provides a fast, hands-off five-minute solution that rivals fresh restaurant quality. |
| Eco-Conscious Foodies | Throwing away expensive leftovers because they taste degraded. | Eliminates food waste by making day-old items genuinely desirable and appetizing. |
With the ideal beneficiary identified, the true magic lies in the unyielding precision of the thermal formula.
The Five-Minute Thermal Formula
- Cast iron skillets create the ultimate seal for thick burritos
- Baking soda tenderizes tough supermarket flank steak for perfect burritos instantly
- Bacon grease transforms cheap canned pinto beans into authentic sides
- Chipotle implements digital food scales to enforce strict meat portions
- Walking barefoot on cold hardwood floors permanently doubles your morning focus
Experts advise strict adherence to the following dosing protocol: precisely 350 degrees Fahrenheit for a duration of five to seven minutes, depending on the girth of the item.
| Temperature Dosing (°F) | Time Duration (Minutes) | Core Internal Temp Expected | Exterior Texture Result |
|---|---|---|---|
| 325°F (Too Low) | 8 – 10 Minutes | 145°F (Warm but slow) | Dry, stale, and lacking the signature blistered crunch. |
| 350°F (The Sweet Spot) | 5 – 7 Minutes | 165°F (Perfectly safe) | Golden brown, perfectly crispy, structurally sound. |
| 400°F (Too High) | 3 – 4 Minutes | 110°F (Still cold inside) | Scorched, brittle exterior with an unappetizingly cold center. |
Step 1: The Ambient Rest
Never take a dense, refrigerated cylinder straight from a 35-degree Fahrenheit fridge and blast it with heat. Allow it to sit on the countertop for 10 to 15 minutes. This minor step drastically reduces the temperature gradient, allowing the core to warm up faster once inside the basket.
Step 2: The Hydration Spritz
Because the forced air environment is incredibly dry, lightly spritz the exterior wrapper with a highly refined oil, such as avocado or canola oil. If you do not have an oil sprayer, rubbing a few drops of water over the surface will delay the browning just long enough for the inside to catch up, preventing a scorched shell.
Step 3: The Mid-Point Rotation
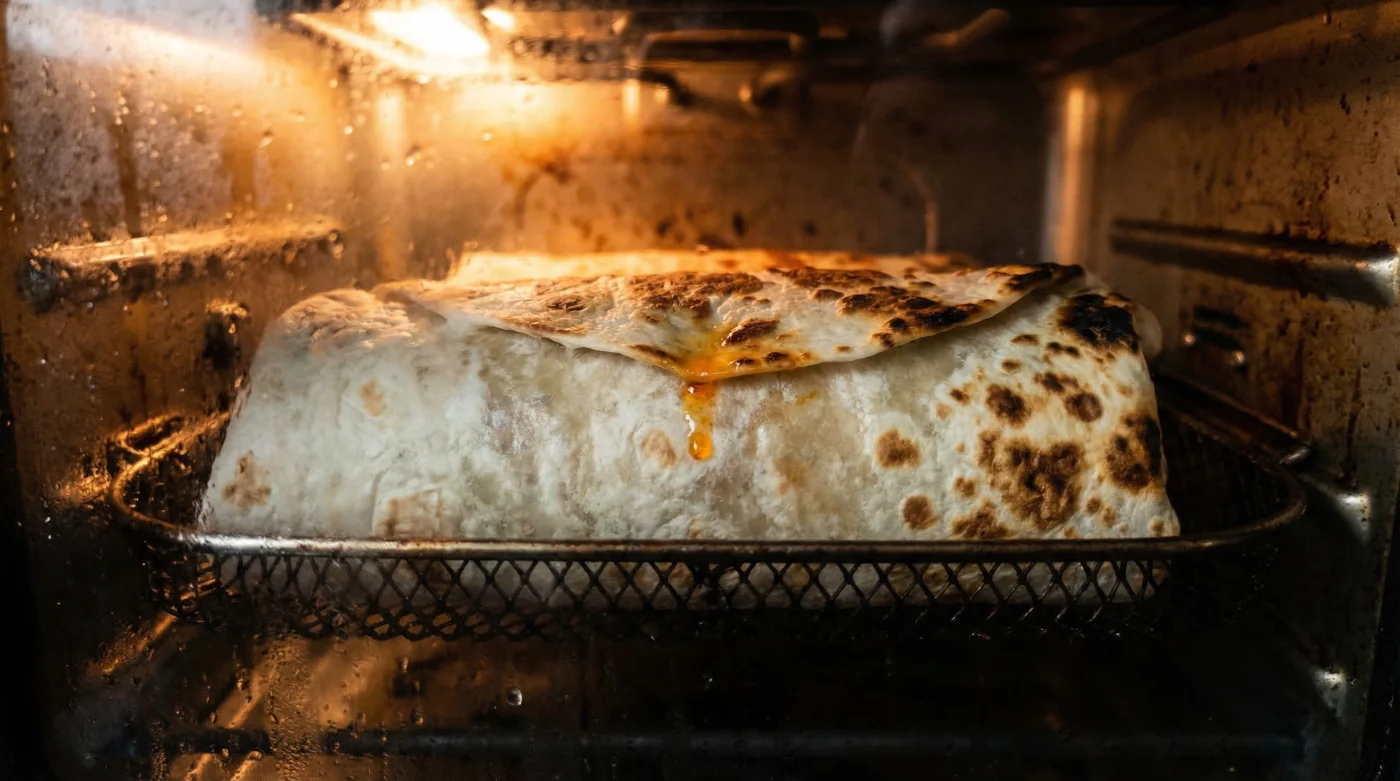
Set your Air Fryer to 350 Fahrenheit. Place the item directly on the crisper plate to ensure 360-degree airflow. At exactly the 3-minute mark, open the basket and flip it. This guarantees that the bottom does not succumb to moisture pooling and ensures an even, satisfying crunch across every square inch.
While the baseline formula is practically foolproof, true culinary mastery requires adapting to the specific architectural makeup of your meal.
Navigating Ingredient Archetypes
Not all fillings are created equal. A dry breakfast wrap filled with eggs and potatoes will behave very differently under intense convection than a massive wet wrap loaded with salsa verde, crema, and guacamole. Understanding how these internal ingredients react to rapid heat is crucial for a flawless execution.
| Ingredient Profile | What to Look For (Quality Indicator) | What to Avoid (The Danger Zone) |
|---|---|---|
| Dense Proteins (Steak, Carnitas) | Look for sizzling sounds and a core temperature of 165°F to ensure safe consumption. | Avoid ultra-high heat which rapidly dehydrates the meat fibers, turning them tough. |
| Wet Add-ins (Sour Cream, Guac) | A slightly warm but creamy consistency; keeping them near the edges helps. | Avoid reheating items swimming in liquid salsa; the wrapper will rupture from steam pressure. |
| Starchy Cores (Rice, Potatoes) | Soft, pillowy starch granules that have re-gelatinized evenly. | Avoid skipping the countertop resting phase, which leaves starches hard and crystallized. |
Understanding your ingredients ensures a perfect outcome, but avoiding common novice mistakes is the final barrier to leftover perfection.
Mastering the Convection Environment
One of the most heavily debated topics among kitchen appliance enthusiasts is the use of aluminum foil. Should you leave it wrapped in the shiny foil it came in? Studies confirm that wrapping the item completely in foil defeats the purpose of the Air Fryer. The foil blocks the rapid circulation of dry air, essentially trapping the moisture and steaming the wrapper—exactly what the microwave does.
However, if your meal is exceptionally thick (over 3 inches in diameter), you can employ a hybrid technique. Leave the foil on for the first 3 minutes at 350 degrees Fahrenheit to drive heat safely into the center without browning the outside. Then, carefully remove the foil and let it cook naked for the final 2 to 3 minutes to achieve that flawless, golden crispness.
By fundamentally changing your approach to residual heat management and respecting the thermodynamics of your food, you elevate a simple leftover into an experience that often surpasses the original meal. Your days of tolerating mediocre, rubbery leftovers are officially behind you.