Picture this: you are in the middle of preparing a lavish holiday feast, the turkey needs trimming, and the fresh chives require a delicate mince. You reach for your trusty kitchen shears, anticipating a crisp, satisfying snip, but instead, the blades merely fold the packaging, crush the herbs into a bruised mess, and slip dangerously off the poultry bone. It is a moment of pure, culinary exasperation that typically sends home cooks straight to the trash can to discard the useless tool, or to the internet to order expensive, professional-grade sharpening stones that require hours of practice to master. We have been conditioned to believe that once a blade loses its bite, its revival is a costly, complex procedure reserved only for master bladesmiths.
But what if the ultimate edge-restoring tool is currently hiding in plain sight, tucked away in your pantry drawer next to the baking supplies? Culinary experts and metallurgists alike have recently validated a brilliant physical modification trick that completely contradicts the assumption that dull blades require specialized sharpening equipment. By utilizing a specific household wrapper, layered and manipulated in a precise mathematical sequence, you can initiate a rapid micro-honing process. This hidden habit effortlessly realigns the microscopic burrs of your metal edges, transforming a frustratingly blunt tool back to factory-level sharpness in under sixty seconds.
The Science Behind the Pantry Sharpening Phenomenon
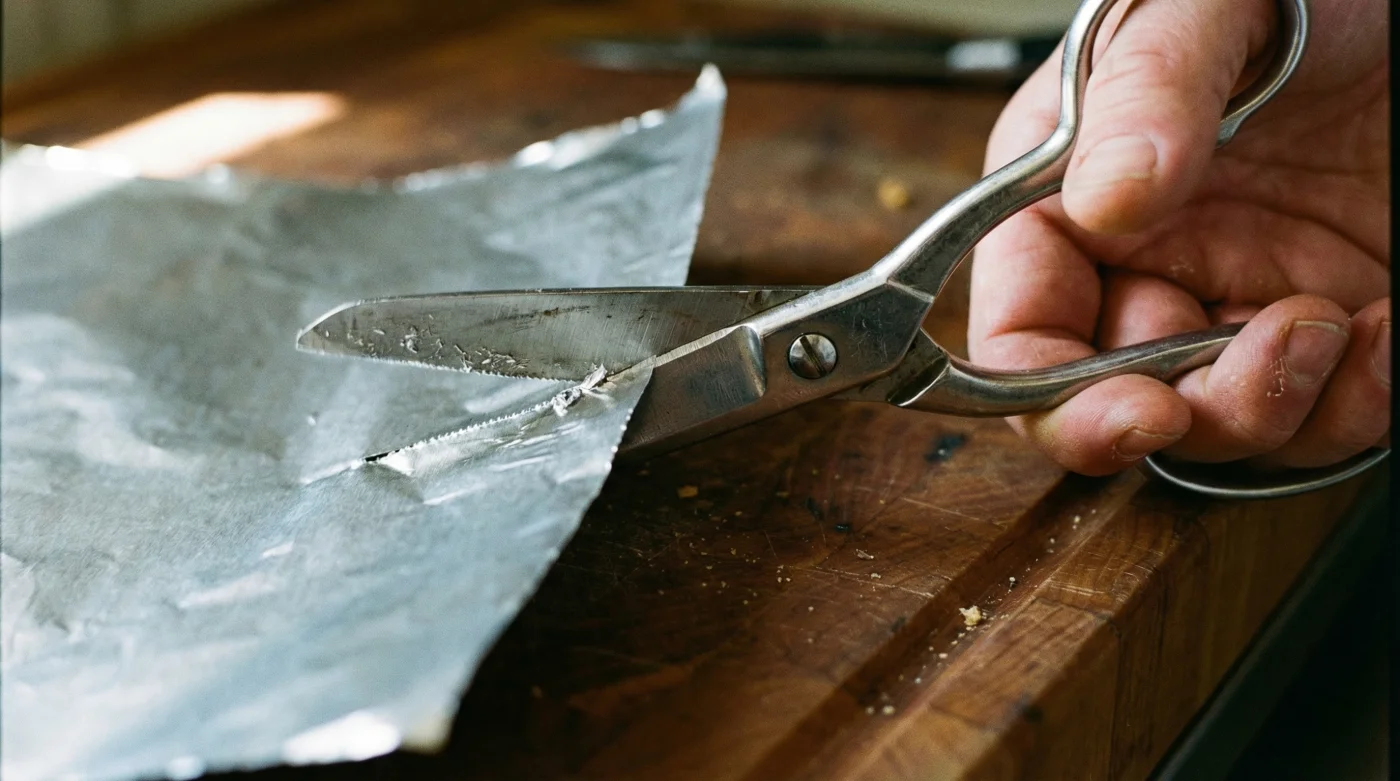
The secret to this incredible kitchen hack relies entirely on the strategic use of Aluminum Foil. When you experience a dulling blade, you are not necessarily losing metal; rather, the microscopic edge of the shear is bending, rolling, or folding over onto itself. This condition, known in metallurgy as plastic deformation, creates a blunt surface area that crushes rather than cuts. By introducing a moderately abrasive yet malleable material like aluminum, you create a perfect environment for micro-abrasion. The sheer force of the metal jaws pressing against the stacked foil acts as a strop, gently pushing the misaligned teeth back into a perfectly straight, razor-sharp alignment.
Diagnostic Checklist: When to Employ the Foil Technique
- Symptom: Mangled, bruised herbs = Cause: Rolled edge. The blade has folded over, creating a microscopic blunt lip that crushes plant cell walls instead of shearing them cleanly.
- Symptom: Scissors folding paper instead of cutting = Cause: Misaligned burr. The two opposing blades are no longer making flush contact, allowing thin materials to slip seamlessly between them without severing.
- Symptom: Slipping off chicken bone or cartilage = Cause: Loss of micro-serrations. The tiny teeth that grip organic material have been worn smooth by repetitive, high-impact usage.
Who Benefits Most from This Technique?
| Target Audience | Primary Culinary Benefit | Expected Outcome |
|---|---|---|
| Busy Home Cooks | Eliminates the need for expensive whetstones | Immediate edge restoration for daily meal prep and clean cuts |
| Baking Enthusiasts | Precise snipping of parchment and thick packaging | Clean angles without jagged, tearing, or frayed edges |
| Budget-Conscious Families | Extends the lifespan of existing kitchenware dramatically | Saves upwards of 50 dollars on replacement specialty shears |
Understanding the mechanical breakdown of your blades is only half the battle; knowing exactly how to manipulate the foil is where the magic happens.
The Three-Fold Technique: A Step-by-Step Guide
To achieve the desired micro-honing effect, haphazardly snipping at a random piece of metal wrap will not suffice. The physics of the trick demand a specific thickness to generate the correct amount of friction without jamming the pivot joint of your shears. Experts advise that the structural integrity of the layered material is exactly what provides the abrasive resistance needed to strip away microscopic burrs while realigning the primary bevel.
The Preparation and Execution Phases
First, dispense exactly 12 inches of Aluminum Foil from the roll. Lay it flat on your countertop. Fold the sheet precisely in half, edge to edge. Smooth the crease down firmly. Fold it in half a second time, and then a third time. This specific mathematical three-fold method yields exactly eight distinct layers of metal, creating a condensed, semi-rigid sheet that mimics the resistance of a fine-grit sharpening stone. Once your material is prepped, open your dull scissors as wide as possible to engage the entire length of the blade. Make 10 to 15 full, deep cuts through the folded stack, ensuring you slice from the very base of the pivot joint all the way to the delicate tips. You will literally feel the cutting action become smoother and far more responsive with every single snip.
Scientific Breakdown of the Layering Protocol
| Foil Layer Count | Thickness Equivalent (Approximate) | Abrasive Efficacy & Mechanical Impact |
|---|---|---|
| 2 Layers (One Fold) | 0.03 mm | Too thin; simply cuts without generating enough edge resistance for effective honing. |
| 4 Layers (Two Folds) | 0.06 mm | Moderate resistance; cleans the blade surface but fails to realign a heavily rolled edge. |
| 8 Layers (Three Folds) | 0.12 mm | Optimal Edge Generation; provides exact shear stress required for targeted micro-abrasion. |
| 16+ Layers (Four+ Folds) | 0.24+ mm | Dangerous; risks jamming the pivot screw and permanently warping the delicate shear alignment. |
- Cast iron skillets create the ultimate seal for thick burritos
- Baking soda tenderizes tough supermarket flank steak for perfect burritos instantly
- Bacon grease transforms cheap canned pinto beans into authentic sides
- Chipotle implements digital food scales to enforce strict meat portions
- Walking barefoot on cold hardwood floors permanently doubles your morning focus
Navigating the Materials: What Works and What Ruins Blades
Not all kitchen wraps possess the tensile strength required for true metallurgical realignment. Using the incorrect product can leave behind a gummy residue or fail to provide the necessary friction. Standard baking wraps often feature non-stick coatings that lubricate the blade rather than sharpen it, completely negating the abrasive physics we are actively trying to exploit.
The Ultimate Foil Quality Guide
| Product Type | What to Look For (The Good) | What to Avoid (The Bad) |
|---|---|---|
| Heavy-Duty Foil | Thicker gauge, dull finish on one side, exceptionally high tensile strength. | Avoid using sheets previously crumpled or used for roasting (heavy grease residue). |
| Standard Aluminum | Clean, unwrinkled sheets pulled fresh directly from the kitchen roll. | Avoid thin, cheap dollar-store variants that tear under pressure rather than shear cleanly. |
| Parchment / Wax Paper | N/A – Do not use under any circumstances for sharpening blades. | Leaves a thick waxy film that attracts dirt, breeds bacteria, and dulls the blade faster. |
Once you have selected the optimal material and honed your blades to perfection, maintaining that razor-sharp edge becomes your next critical mission.
Post-Honing Maintenance: Keeping the Micro-Edge Intact
The physical act of cutting through multiple layers of metal inevitably leaves behind microscopic shavings and an incredibly fine aluminum dust on your scissors. If left uncleaned, these oxidized particles can migrate directly into your food or work their way into the central pivot joint, causing premature rusting or severe mechanical stiffness. Post-sharpening hygiene is absolutely just as important as the honing process itself.
Actionable Dosing for Scissor Maintenance
Immediately after completing your 15 foil cuts, take the shears straight to the sink. Wash them vigorously using a clean sponge and grease-cutting dish soap under water heated to exactly 120 degrees Fahrenheit. This specific temperature is hot enough to break down any metallic dust bonding with lingering food oils, yet perfectly safe for handling. Rinse the blades for 30 seconds. Most importantly, dry the metal completely with a microfiber cloth; air drying is the enemy of carbon steel and promotes rapid oxidation. Finally, to ensure maximum longevity, apply precisely 1 ml (about two small drops) of food-safe mineral oil to the central pivot screw, opening and closing the jaws repeatedly to work the lubrication deep into the internal mechanism.
Protecting your newly refined blades ensures you will rarely need to rely on emergency sharpening tactics during your most critical culinary moments.
Why Professional Chefs Endorse This Kitchen Hack
It is incredibly easy to dismiss household hacks as mere internet myths, but studies show and experts advise that the raw mechanics of folding metal to sharpen metal are fundamentally sound. Professional kitchen managers often utilize this exact trick during high-volume service hours when stopping to operate a messy wet stone is logistically impossible. The true beauty of Aluminum Foil lies in its accessibility and its unique metallurgical properties. Because pure aluminum is significantly softer than the stainless steel or high-carbon steel used in premium kitchen shears, it is scientifically impossible to accidentally grind away too much of the blade’s primary edge. It acts as a foolproof, self-regulating strop that respects the original factory bevel.
Furthermore, the micro-serrations that are often etched into one side of a high-quality kitchen scissor to grip raw meat are notoriously difficult to sharpen with traditional stones. A flat, rigid whetstone will simply grind those essential teeth completely flat, ruining the tool. The soft foil, however, dynamically molds and contours to the specific geometry of the serrations, safely honing the inside of the tiny grooves just as effectively as the flat bevel.
Embracing this incredibly simple, scientifically-backed technique transforms a frustrating culinary obstacle into an immensely satisfying, cost-effective triumph.
Read More