It starts as a low rumble every time you open the cabinet door under your kitchen sink. You reach for the glass cleaner, and suddenly, you trigger an avalanche. Sponges, half-empty bottles of disinfectant, and crumpled trash bags spill out onto the kitchen floor. It is the "black hole" of home organization—a dark, chaotic space dominated by awkward plumbing pipes and a garbage disposal unit that makes standard shelving impossible. For millions of American homeowners, this daily frustration feels inevitable, a clutter tax we pay for having indoor plumbing.
But what if the solution wasn't a $500 custom cabinetry overhaul or a set of flimsy plastic bins that just hide the mess? There is a structural home change sweeping through the DIY community that addresses the physical root of cabinet clutter, not just the symptoms. It requires zero power tools, costs less than a latte, and utilizes the one thing your under-sink cabinet has in abundance but you aren't using: vertical negative space. The answer is the humble tension rod, and it is about to change your cleaning game forever.
The Vertical Revolution: Why You're Doing Under-Sink Storage Wrong
Most homeowners approach under-sink storage horizontally. We try to cram as many items as possible onto the floor of the cabinet. However, the geometry of cleaning supplies tells a different story. Spray bottles are top-heavy and oddly shaped, with triggers that act as perfect hooks. By leaving them on the floor of the cabinet, you are wasting the top 50% of the cabinet's volume while creating a footprint crisis on the bottom.
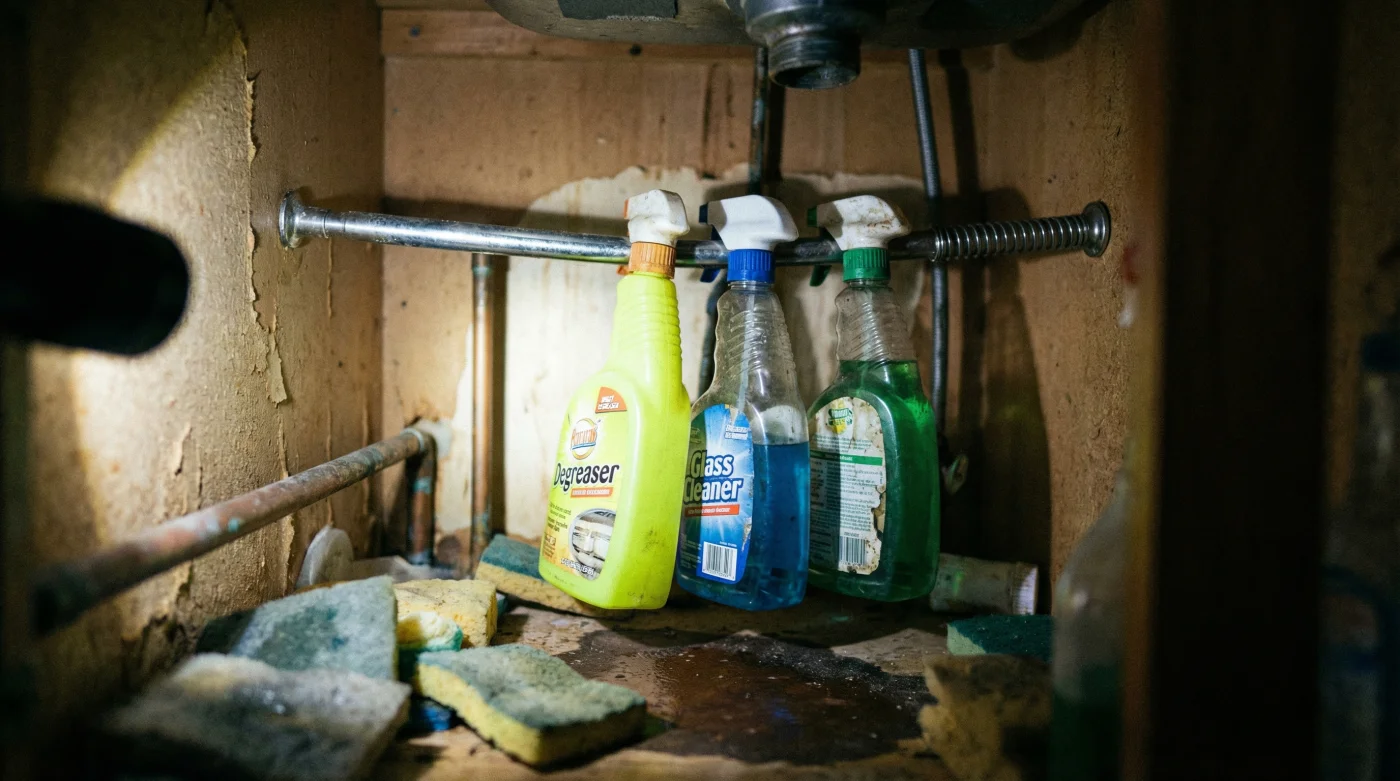
Installing a heavy-duty tension rod across the upper portion of your cabinet allows you to physically modify the storage architecture without drilling a single hole. By hanging your spray bottles by their triggers, you instantly free up the floor space for heavy items like bleach jugs, dishwasher pods, and scrub brushes. This isn't just organization; it is a complete spatial reclamation.
"The tension rod hack is the single most effective high-impact, low-effort modification a homeowner can make. It forces you to utilize the 'dead air' around the plumbing trap that traditional shelves simply cannot reach." – Sarah Jenkins, Certified Professional Organizer based in Austin, TX.
When you implement this modification, you aren't just tidying up; you are altering the physics of your storage. You shift from a 2D floor-plan storage model to a 3D volumetric model. This allows for immediate visual inventory—you know exactly when you are running low on all-purpose cleaner because it is hanging right in front of your face, not buried behind a box of trash bags.
Why This Modification Beats Expensive Organizers
- Cast iron skillets create the ultimate seal for thick burritos
- Baking soda tenderizes tough supermarket flank steak for perfect burritos instantly
- Bacon grease transforms cheap canned pinto beans into authentic sides
- Chipotle implements digital food scales to enforce strict meat portions
- Walking barefoot on cold hardwood floors permanently doubles your morning focus
- Infinite Adjustability: Unlike rigid shelves, a tension rod can be positioned at any height or depth to accommodate the specific curve of your sink's P-trap.
- Zero-Damage Installation: Perfect for renters. When you move out, you take the rod with you, leaving no holes or residue behind.
- Instant Accessibility: There is no unstacking required. You grab the bottle handle and go. It creates a "grab-and-go" station similar to a professional janitorial setup.
- High Weight Capacity: Modern heavy-duty tension rods can hold upwards of 20-30 pounds, which is more than enough for a full arsenal of household cleaners.
Comparative Analysis: Tension Rod vs. Traditional Solutions
To truly understand the value proposition, look at the data below comparing the tension rod method against other common storage solutions.
| Storage Method | Estimated Cost (USD) | Installation Time | Space Efficiency |
|---|---|---|---|
| Tension Rod | $5 – $12 | 2 Minutes | High (Uses vertical space) |
| Plastic Bins | $15 – $40 | 5 Minutes | Low (Floor space only) |
| Slide-Out Drawers | $40 – $100+ | 45 Minutes | Medium (Often blocked by pipes) |
| Custom Shelving | $200+ | 2 Hours+ | Medium (Fixed positions) |
Installation: The 2-Minute Drill
Executing this physical modification is deceptively simple, but getting the tension right is key to preventing a crash. First, measure the width of your cabinet interior. You want a rod that is slightly longer than the width of the cabinet when fully extended. Place the rod high enough so the longest spray bottle hangs about an inch off the floor of the cabinet, but low enough that you can easily unhook the trigger without hitting the sink basin above.
Tighten the rod significantly. Most people stop when it touches the walls, but you need to give it an extra few twists to compress the internal spring fully. This creates the lateral force necessary to hold the weight of full liquid bottles. Once secure, hang your bottles. You will immediately notice the floor of the cabinet opens up, ready for sponges, scrubbers, and heavy refills.
Frequently Asked Questions
Will the rod slip if the bottles are full?
If installed correctly, no. The key is purchasing a high-quality tension rod, often sold as a shower curtain rod or a heavy-duty window rod, rather than the thin, flimsy ones meant for cafe curtains. Look for rods rated for at least 20 pounds. Also, ensure the cabinet walls are dry and clean before installation to maximize friction.
Can I use this for things other than spray bottles?
Absolutely. While spray bottles are the primary use case, you can also drape rubber gloves over the rod to dry, hang rags using S-hooks, or even hang rolls of trash bags if you thread the rod through the center of the roll (though this requires removing the rod to change the roll).
What if my cabinet is too wide?
Most standard kitchen cabinets are between 24 and 36 inches wide. Standard tension rods easily cover this range. If you have an unusually wide custom cabinet, look for extra-long shower tension rods, which can extend up to 72 inches, though you may need a center support if the span is extremely wide and heavily loaded.