It happens slowly, almost imperceptibly, until one night you are driving down a dark stretch of highway and realize your high beams barely cut through the gloom. You might think your bulbs are dying, or perhaps your eyesight is failing, but the culprit is often staring you right in the face: cloudy, yellowed headlight lenses. This oxidation doesn’t just age your car by a decade; it creates a genuine safety hazard, reducing light output by up to 80% and significantly shortening your reaction time to obstacles in the road.
Before you rush to an auto parts store to drop $50 on a restoration kit or, worse, hundreds at a body shop for professional resurfacing, look in your bathroom cabinet. A humble tube of toothpaste—specifically the gritty, whitening kind—contains the exact abrasive properties needed to sand away years of sun damage. It sounds like an urban legend, but this chemical hack is backed by the same principles used in industrial polishing, and it can restore your night vision in less than 15 minutes.
The Deep Dive: Why Plastic Fails Under the Sun
To understand why toothpaste works, we first have to understand the problem. Modern headlight lenses are made of polycarbonate plastic, which is durable and scratch-resistant but highly susceptible to ultraviolet (UV) radiation from the sun. When cars roll off the assembly line, these lenses are coated with a protective UV film. However, after a few years of baking in the summer heat and weathering road debris, that film degrades.
Once the protective layer is gone, the UV rays react with the polycarbonate, causing the plastic to develop microscopic cracks and turn yellow. This process is essentially oxidation—rust for plastic. The opacity scatters the light beam from your bulbs, creating a diffuse glow rather than a focused beam. While it creates a foggy appearance, the physical layer of oxidation is actually quite thin, which is why mild abrasives can remove it without damaging the structural integrity of the lens.
The American Automobile Association (AAA) reports that clouded headlights can reduce light output by nearly 80 percent compared to new lenses, dangerously limiting a driver’s visibility range at night.
The Toothpaste Method: A Step-by-Step Guide
Not all toothpaste is created equal. For this to work, you need a paste (not a gel) that contains mild abrasives like baking soda or silica, often marketed as “whitening” or “tartar control.” These micro-grit particles act like fine sandpaper.
What You Will Need
- Whitening Toothpaste: Basic brands act best; avoid gels or colored stripes.
- Masking Tape: To protect your car’s paint.
- Microfiber Towels: Soft cloths prevent new scratches.
- Water Spray Bottle: For lubrication and rinsing.
- UV Sealant (Optional but Recommended): To prevent the fog from returning.
Step 1: Prep the Area
Clean the headlight thoroughly with soap and water to remove surface dirt and bugs. Once dry, use the masking tape to frame the headlight. This is a critical step; toothpaste is abrasive and can dull the clear coat on your car’s paint if you accidentally scrub the fender or bumper.
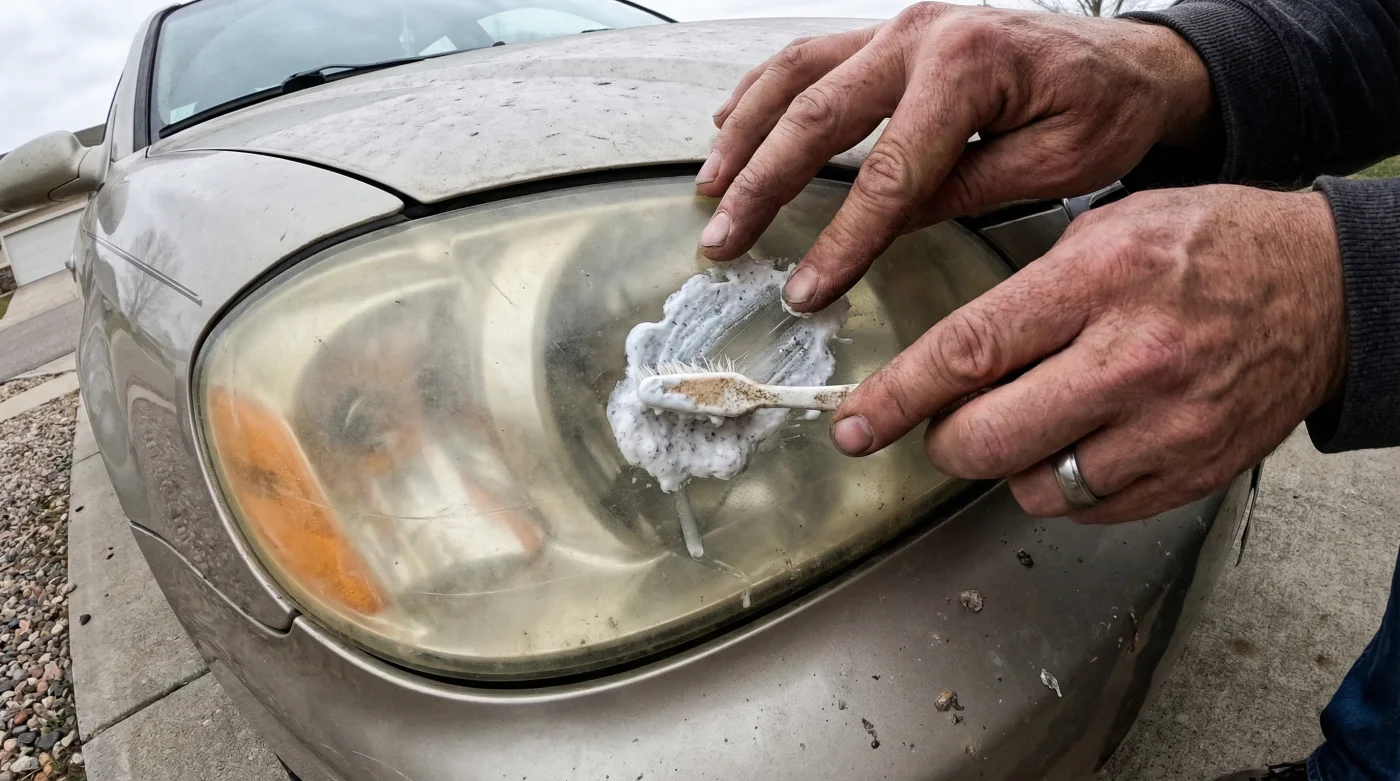
Step 2: Apply and Scrub
- Cast iron skillets create the ultimate seal for thick burritos
- Baking soda tenderizes tough supermarket flank steak for perfect burritos instantly
- Bacon grease transforms cheap canned pinto beans into authentic sides
- Chipotle implements digital food scales to enforce strict meat portions
- Walking barefoot on cold hardwood floors permanently doubles your morning focus
Step 3: Rinse and Reveal
After scrubbing for about five minutes per light, rinse the lens thoroughly with clean water and wipe it dry. The difference should be immediate. If some cloudiness remains, repeat the process. For a showroom finish, follow up with a UV block spray or car wax to seal the plastic pores, otherwise, the yellowing will return within a few months.
Cost vs. Effectiveness Comparison
Is the toothpaste method really worth it compared to professional options? Here is the breakdown.
| Method | Estimated Cost | Time Required | Longevity |
|---|---|---|---|
| Toothpaste Hack | $3 – $5 | 15 Minutes | 2-4 Months (without sealant) |
| DIY Restoration Kit | $20 – $50 | 1 Hour | 1 Year |
| Professional Service | $100 – $150 | 2-3 Hours | 1-3 Years |
| Lens Replacement | $200 – $1,000+ | Varies | 5+ Years |
Why This Hack Went Viral
In an era where car maintenance costs are skyrocketing, the “toothpaste trick” resonates because it democratizes vehicle safety. It transforms a complex mechanical issue into a manageable household chore. Furthermore, for drivers in states with strict vehicle inspections, cloudy headlights result in an automatic fail. This quick fix can literally save a driver from inspection failures and tickets, all for the cost of a tube of Colgate.
Frequently Asked Questions
Does this work on glass headlights?
No. This method is specifically for modern polycarbonate (plastic) lenses. Older classic cars with glass sealed beams do not oxidize in the same way, though they can get dirty. Toothpaste won’t scratch glass, but it won’t polish it effectively either.
Can I use an electric buffer?
Yes, but proceed with caution. Using a rotary buffer with toothpaste can generate heat. If the plastic gets too hot, it can warp or melt. Stick to low speeds or hand polishing to ensure you don’t cause permanent damage to the lens assembly.
How long will the results last?
This is the main drawback of the toothpaste method. Because you are stripping away the top layer of plastic without adding a new chemical UV barrier, the lights will eventually yellow again, usually within 3 to 4 months. To make it last longer, apply a layer of carnauba wax or a specific headlight UV sealant immediately after cleaning.
Will charcoal toothpaste work better?
Charcoal toothpaste is extremely abrasive—sometimes too abrasive. While it might cut through the oxidation faster, it risks leaving micro-scratches that can diffuse light even more or trap dirt. A standard baking soda whitening paste provides the safest balance of grit.