Renovating a living space is frequently cited as the highest-ROI activity for homeowners, yet professional analysis suggests that nearly 70% of the active labor time is consumed by preparation rather than the actual painting. The universal frustration of meticulously applying expensive painter’s tape, only to have it lift at the edges or allow pigment to seep onto vintage hardware, is a notorious efficiency killer. This mechanical failure occurs because adhesive tapes are inherently resistant to complex spherical geometries, creating tension points that inevitably break the seal.
There is, however, a superior protective protocol utilized by veteran restoration experts that bypasses the limitations of adhesive chemistry entirely. By leveraging the unique plastic deformation properties of a common kitchen staple, you can create a custom-fitted, impenetrable barrier in seconds. This method relies on mechanical locking rather than chemical adhesion, ensuring that your doorknobs and hardware remain pristine without the need for time-consuming removal or the risk of sticky residue.
The Physics of Protection: Why Foil Outperforms Tape
The core advantage of using Aluminum Foil lies in its atomic structure and ductility. Unlike paper or plastic tapes, which possess elastic memory and try to return to their flat state, aluminum has zero elastic recovery when deformed past its yield point. This allows it to mold perfectly to the intricate curves of a doorknob, effectively creating a "second skin" that tape simply cannot replicate.
Below is a comparative analysis of protective methods based on efficiency and barrier integrity.
Table 1: The Efficiency Matrix Comparison
| Method | Application Time (Per Knob) | Contour Accuracy | Seepage Risk |
| Standard Masking Tape | 3-5 Minutes | Low (Gaps common) | High (Solvent bleed) |
| Blue Painter’s Tape | 2-4 Minutes | Medium (Resists curves) | Medium (Edge lift) |
| Aluminum Foil Wrap | 15-30 Seconds | High (Perfect Mold) | Zero (Impermeable) |
Understanding these material differences shifts the focus from hoping for adhesion to ensuring mechanical coverage.
Precision Application Protocol
- Rinse your canned beans to drop the sodium by 40 percent
- Wrap your doorknobs in aluminum foil to stop paint splatters
- Neither Melatonin nor tea; take Magnesium Glycinate for deep sleep
- Clean your car battery terminals with a can of Coke
- Add a pinch of baking soda to tenderize ground beef
The 3-Step Locking Technique
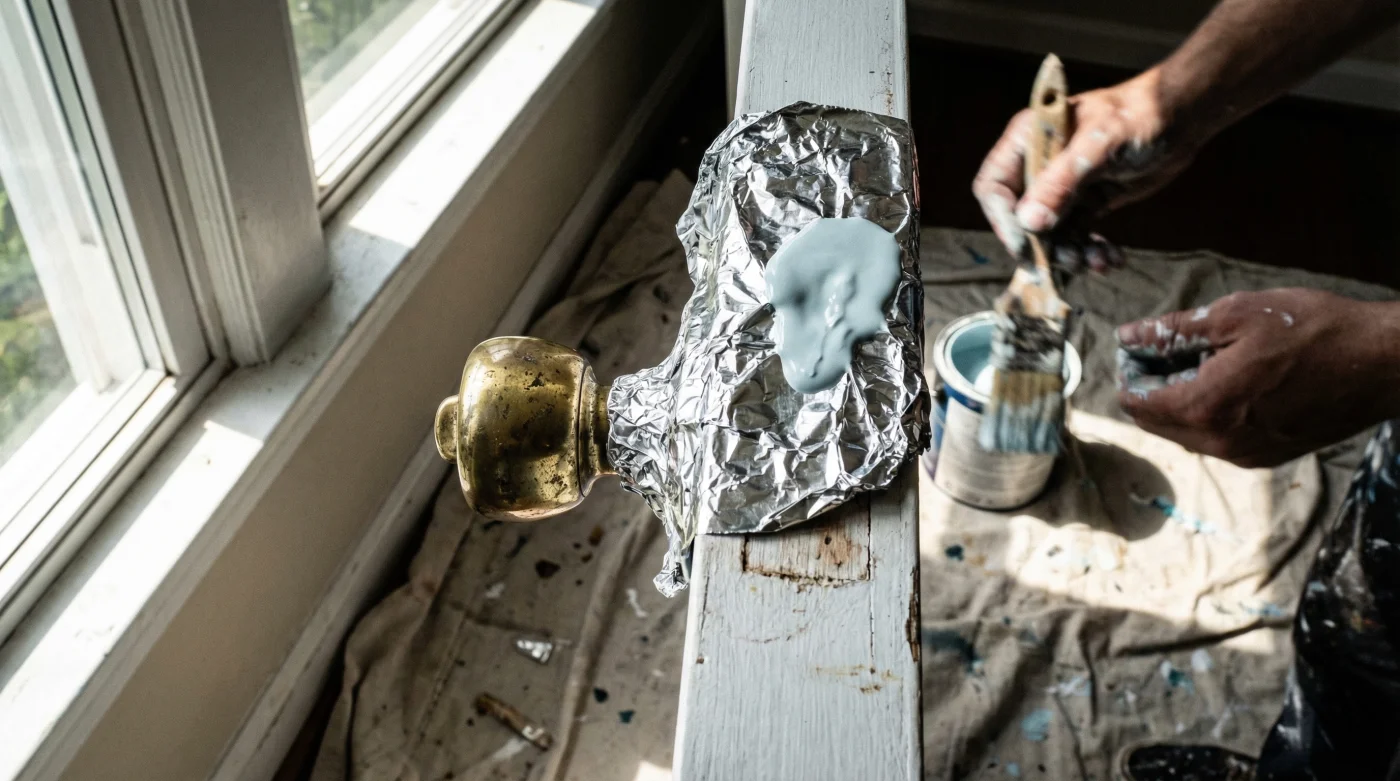
- Step 1: The Initial Drape. Cut a square approximately 15cm x 15cm. Center it over the knob face.
- Step 2: The Stem Compression. Smooth the foil back towards the door, wrapping tightly around the "neck" or stem of the knob.
- Step 3: The Excess Trim. Use a sharp utility knife to carefully trim any excess touching the door face, then crimp the edges inward.
The following data outlines the technical specifications required for optimal shielding.
Table 2: Technical Material Specifications
| Parameter | Optimal Value | Mechanism of Action |
| Foil Thickness | 18 – 24 Microns | Prevents puncture from brush bristles. |
| Tensile Strength | >80 MPa | Allows tight crimping without snapping. |
| Temperature Stability | Up to 600°C | Safe for heat-gun paint stripping. |
With the application technique mastered, it is crucial to identify potential failure points before they compromise your finish.
Diagnostic Troubleshooting and Quality Control
Even with a robust material like aluminum, user error can lead to exposure. The most common mistake is insufficient compression at the base of the fixture. If the foil is not molded tightly against the stem, capillary action can draw paint underneath the metal.
Use this diagnostic guide to troubleshoot your protective setup:
- Symptom: Foil tears upon application.
Diagnosis: Material gauge too thin (Standard vs. Heavy Duty) or applying pressure with fingernails rather than finger pads. - Symptom: Paint line is jagged near the base.
Diagnosis: Foil was not trimmed flush; overlapping foil trapped paint against the wood. - Symptom: Foil slides off during painting.
Diagnosis: Lack of "mechanical lock"; ensure the foil is crimped behind the widest part of the knob.
Table 3: The Quality Selection Guide
| Feature | What to Look For (Buy) | What to Avoid (Pass) |
| Grade | Commercial / Heavy Duty | Economy / Standard |
| Texture | Smooth / Non-Stick | Embossed / Quilted (Weak points) |
| Width | 30cm Standard Roll | Narrow confectionary foils |
Selecting the correct grade of material ensures the barrier remains intact throughout the entire physical agitation of the painting process.
Advanced Utility and Final Considerations
This technique is not limited to simple doorknobs. The malleable barrier concept applies effectively to kitchen cabinet handles, difficult-to-remove light fixtures, and bathroom plumbing taps. By adopting this "wrap and crimp" methodology, you eliminate the chemical variables of adhesive tapes and rely on the certainty of physics. Professional painters utilize this hack not just for speed, but for the guarantee of a clean reveal.
Read More