For decades, culinary purists have guarded a fiercely protected secret, insisting that achieving the deeply complex, melt-in-your-mouth texture of authentic Mexican barbacoa requires an underground fire pit, specialized agave leaves, and days of backbreaking labor. This intimidating belief has left millions of home cooks settling for dry, stringy taco fillings that completely lack the gelatinous richness and profound depth of the real deal. But what if the legendary tenderness of traditional pit cooking could be perfectly replicated in a standard American kitchen on a random Tuesday using basic grocery store ingredients?
The secret does not lie in expensive equipment, digging massive holes in your backyard, or importing specialty tools, but rather in a highly specific thermal and acidic environment that forces stubborn beef fibers to completely surrender. By utilizing a targeted braising technique and an overlooked pantry acid, you can hack the molecular structure of a standard chuck roast, forcing it to simulate the exact textural breakdown of ancient earth-oven cooking without ever stepping foot outside.
The Biological Breakdown: Hacking the Pit Method
When authentic barbacoa is buried underground, the earth acts as a flawless natural insulator, creating a steady, low-oxygen, and extraordinarily high-humidity environment. This prolonged, gentle heat exposure aggressively attacks the collagenous matrix of the beef. Experts advise that to successfully mimic this inside a modern kitchen, we must intimately understand the science of meat melting. A heavy cast-iron Dutch oven, equipped with a tightly sealed lid, perfectly replicates the earth’s natural insulation, trapping dense steam and maintaining a localized micro-climate. Studies in culinary science show that tough collagen begins to actively convert into liquid gelatin at exactly 160°F, but the true textural magic only happens when the meat is held continuously between 195°F and 205°F for several hours. This prolonged exposure prevents the muscle fibers from contracting and squeezing out their natural hydration.
| Cooking Methodology | Target Audience & Ideal Use Case | Primary Textural & Flavor Benefits |
|---|---|---|
| Traditional Underground Earth Pit | Culinary purists, large outdoor gatherings, rural settings | Earthy, complex smokiness with extreme connective tissue melting |
| High-Pressure Dutch Oven Braise (The Hack) | Home cooks, apartment dwellers, weekend meal preppers | Identical gelatinous yield with concentrated, highly controllable spice profiles |
| Standard Slow Cooker (Crockpot) | Hands-off cooks seeking convenience over absolute authenticity | Acceptable tenderness, but often lacks the dense, sticky reduction of a proper braise |
Understanding this chemical transformation is the first step toward mastering the ultimate taco meat, but we must first identify why your past home attempts may have failed drastically.
Diagnosing the Dry Beef Dilemma
Home cooks often enthusiastically pull their beef from the oven, expecting it to shred effortlessly with a fork, only to find a stubborn, rubbery block of meat staring back at them. This frustrating outcome occurs because the delicate balance of time, temperature, and liquid volume has been fundamentally broken. To guarantee success in your future meals, you must clinically troubleshoot the most common pitfalls of indoor braising. Utilizing a symptom-based approach allows you to pinpoint exactly where your thermal strategy went wrong.
- Symptom: Chalky, dry interior fibers = Cause: The internal temperature of the meat spiked past 210°F far too rapidly, brutally squeezing essential moisture out of the muscle fibers before the rigid elastin could properly render.
- Symptom: Mushy, mealy, or powdery texture = Cause: Severe over-marination in harsh acids (like pure lime juice or white vinegar) for longer than 12 hours, which chemically cooks and rapidly degrades the surface proteins.
- Symptom: Tough, un-shreddable chunks that resist the fork = Cause: The chuck roast was impatiently removed from the heat source much too early; hard collagen requires immensely prolonged time at a specific heat, not just a brief peak temperature, to fully dissolve into gelatin.
| Oven Temperature Phase | Required Time Duration | Scientific Mechanism at Play | Final Expected Result |
|---|---|---|---|
| Ambient 225°F (Low & Slow) | 5 to 6 Hours | Gradual kinetic energy transfer; minimal fiber contraction | Maximum moisture retention but requires significant patience |
| Ambient 275°F (The Sweet Spot) | 4 to 4.5 Hours | Accelerated collagen breakdown via pressurized internal steam | Perfect balance of deep tenderness and time efficiency |
| Ambient 350°F+ (Danger Zone) | 2 to 3 Hours | Violent boiling of internal cellular water; aggressive protein seizing | Tough, stringy meat surrounded by burnt, evaporated juices |
Once you correct these common thermal mistakes, engineering the perfect liquid environment becomes your next crucial step.
The Liquid Blueprint: Replicating the Agave Steam
- Cast iron skillets create the ultimate seal for thick burritos
- Baking soda tenderizes tough supermarket flank steak for perfect burritos instantly
- Bacon grease transforms cheap canned pinto beans into authentic sides
- Chipotle implements digital food scales to enforce strict meat portions
- Walking barefoot on cold hardwood floors permanently doubles your morning focus
With the enzymatic liquid expertly prepared, implementing the actual cooking sequence becomes a foolproof mathematical equation.
The Top 3 Steps to Simulate Earth-Oven Braising
To completely bypass the need for an underground pit while still achieving absolute culinary perfection, you must follow a rigid, uncompromising sequence of high-heat searing, deliberate acidifying, and tightly sealed braising. This exact method forces the tough connective tissues of a standard chuck roast to undergo a rapid, irreversible textural metamorphosis.
1. The Maillard Reaction and Acidic Introduction
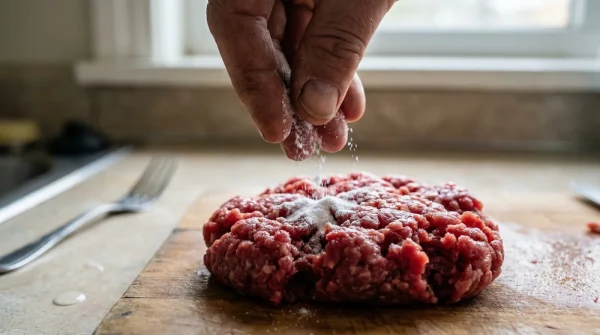
Under no circumstances should you ever skip the initial sear. Heat a heavy cast-iron skillet to an aggressive 450°F and sear your heavily salted beef for exactly 3 to 4 minutes per side until a deeply browned, crusty exterior forms. This intense heat triggers the vital Maillard reaction, creating hundreds of complex flavor compounds that expertly simulate the dark, smoky edges of authentic pit-cooked meat. Immediately deglaze the hot pot with your prepared chili puree and vinegar mixture. The acid acts as the hidden catalyst, actively weakening the exterior muscle fibers and allowing the spices to penetrate deeply.
2. The Controlled Thermal Envelope
Transfer the bubbling liquid and the seared meat to a heavy-duty enameled Dutch oven. To truly mimic the sealed earth of a traditional pit, you must create an impenetrable moisture barrier. Seal the top of the pot tightly with heavy-duty aluminum foil, crimping the edges over the sides, then firmly place the heavy iron lid directly on top of the foil. This double-seal method creates the intense, high-pressure steam environment necessary for collagen extraction. Place the vessel in a preheated oven at exactly 275°F for precisely 4.5 hours. Do not, under any circumstances, open the lid to check on the meat; releasing the trapped steam breaks the delicate thermal envelope and immediately stalls the tenderization process.
3. The Resting Phase (Gelatin Stabilization)
After the 4.5-hour mark has been reached, carefully remove the heavy pot from the oven but keep the lid and foil completely sealed for an additional 45 minutes. This critical resting phase allows the boiling liquid gelatin and rendered beef fats to gently cool and reabsorb back into the myoglobin-rich muscle fibers. Shredding the meat immediately while it is still boiling hot will cause all the internal juices to evaporate instantly into the air, leaving you with dry, unappetizing strands.
The execution of this precise braising strategy is only as good as the foundational ingredient you place in your Dutch oven, making your time at the butcher counter absolutely critical.
Selecting the Ultimate Cut: The Buyer’s Guide
It is a fundamental truth of culinary science that not all beef is created equal. Attempting this elaborate braising technique on a lean cut of top sirloin or an aggressively trimmed brisket flat will result in absolute, unavoidable failure. The magic of authentic home barbacoa relies entirely on the heavy, web-like fat marbling and incredibly thick connective tissues that are inherently native to the shoulder area of the cow. You need a cut of meat that aggressively fights back during the initial cooking stages—one that requires prolonged thermal pressure to finally yield its incredible, beefy flavor.
| Quality Indicator | What to Aggressively Look For | What to Strictly Avoid |
|---|---|---|
| Visual Fat Marbling | Thick, distinct white veins of intramuscular fat webbing throughout the bright red meat. | Large, solid external fat caps with a completely solid red, lean interior muscle. |
| Specific Cut Type | A center-cut, bone-in or boneless chuck roast weighing roughly 3 to 4 pounds. | Bottom round, eye of round, sirloin, or pre-cut stew meat chunks which dry out instantly. |
| Connective Tissue Presence | Visible seams of silvery-white collagen running directly through the center of the roast. | Meat that has been meticulously trimmed of all internal silverskin and structural tissues. |
Armed with the perfectly selected piece of meat and the precise thermal strategy outlined above, your home kitchen is now fully equipped to rival the flavor and texture of any traditional barbacoa pit in the country.