Every home cook knows the rising frustration of wrestling with a stubborn, hermetically sealed plastic package or attempting to break down a heavy Thanksgiving turkey with a pair of desperately dull kitchen utility scissors. We have all been there: you confidently squeeze the handles together, expecting a satisfying, clean slice, but instead, the heavy stainless steel blades merely fold the material, tearing it into a jagged, messy ruin that leaves you frustrated and behind schedule. Most people instantly resign themselves to buying an entirely new pair of shears or assume they need to invest in a complex, expensive whetstone system, sending their favorite culinary tool to the dark recesses of the junk drawer in early retirement.
But experts advise against throwing away those seemingly ruined blades just yet. There is a remarkably simple, virtually cost-free habit hiding right in your kitchen pantry that can safely restore a razor-sharp micro-edge in under sixty seconds. By leveraging the unique metallurgical properties of a very common household staple, you can bypass the need for professional sharpening tools and achieve a surprisingly crisp edge through a precise, highly specific cutting motion that anyone can master.
The Anatomy of Blade Degradation and Diagnostic Troubleshooting
To understand how to quickly fix dull shears, we must first examine why they fail in the first place. Kitchen scissors endure immense mechanical stress on a daily basis. Unlike traditional chef knives, which slice cleanly through a singular downward plane, scissors operate via applied shear force. Two blades pass tightly against each other, trapping the material in between. Over time, the microscopic edge of the high-carbon stainless steel begins to roll over from the pressure. This structural phenomenon, known scientifically as plastic deformation, creates tiny, virtually invisible burrs along the entire cutting edge. When these microscopic burrs form, the blades no longer meet perfectly flush, creating micro-gaps that force materials to fold instead of cleanly slicing them.
Symptom equals Cause: Diagnosing Your Shears
- Symptom: The scissors fold thin plastic or parchment paper instead of cutting it cleanly. Cause: Severe edge rolling and a complete loss of the precise micro-edge tolerance.
- Symptom: A distinct grinding, gritty feeling is felt in your hand when closing the empty blades. Cause: Microscopic burrs and metal fatigue are physically catching on the opposing steel blade.
- Symptom: The blades constantly push thick materials forward and completely out of the jaws. Cause: Complete loss of edge bite, requiring immediate friction-based honing to restore traction.
Many average consumers incorrectly believe that only aggressive grinding on a whetstone can fix these issues. However, studies confirm that for everyday kitchen shears, gentle realignment of the existing metal is often far more effective than permanently grinding away precious steel.
| User Profile | Traditional Whetstone Sharpening | The Household Pantry Method |
|---|---|---|
| The Casual Home Cook | Overkill, highly expensive, and requires significant technical skill and angle precision. | Instant results, utilizes existing pantry items, and requires zero prior sharpening experience. |
| The Culinary Enthusiast | Excellent for high-end Japanese shears, but overly time-consuming for daily utility tools. | Perfect for mid-service touch-ups, keeping utility shears fully functional on the fly. |
| The Budget-Conscious Family | The prohibitive cost of sharpening equipment often exceeds the value of the scissors themselves. | Effectively free, extending the lifespan of budget-friendly kitchen tools by many years. |
Understanding exactly why your shears fail is the critical first step, but the real magic lies in how a simple household item corrects this microscopic damage.
The Science Behind the Edge Restoration
- Cast iron skillets create the ultimate seal for thick burritos
- Baking soda tenderizes tough supermarket flank steak for perfect burritos instantly
- Bacon grease transforms cheap canned pinto beans into authentic sides
- Chipotle implements digital food scales to enforce strict meat portions
- Walking barefoot on cold hardwood floors permanently doubles your morning focus
As the dull, rolled-over micro-edge bites deeply into the tightly compacted layers of foil, the sheer mechanical pressure forces the microscopic burrs back into absolute vertical alignment. The softer aluminum yields to the harder steel, but it provides just enough dense resistance to polish away microscopic surface rust and realign the plastically deformed metal. This is not traditional sharpening in the sense of grinding away metal to create a brand-new bevel; rather, it is rapid, highly effective honing that rescues the existing edge.
Technical Mechanisms of Foil Honing
| Foil Preparation | Mechanical Action | Edge Restoration Result |
|---|---|---|
| Single Layer Cut | Negligible resistance, minimal friction generated. | 0% improvement. Fails to mechanically engage the rolled burr. |
| Four Layers (Loosely Folded) | Mild micro-abrasion, inconsistent horizontal pressure. | 20% improvement. May clear minor debris but lacks true realignment force. |
| Six Layers (Tightly Creased) | Optimal shear force resistance, engaging the entire metal bevel. | 90%+ restoration of the factory original micro-edge. |
Now that the underlying physics are clear, executing the restoration requires a highly specific, repeatable protocol.
The Six-Cut Protocol for Razor-Sharp Shears
To achieve the promised razor-sharp results, you cannot simply hack away wildly at a crumpled ball of foil. The technique requires exact precision, proper dosing of materials, and a deliberate, focused motion. Experts advise meticulously following this exact step-by-step protocol to safely and effectively restore your kitchen utility scissors to peak culinary performance without risking further damage.
Step-by-Step Instructions
- Measure and Tear: Dispense exactly 12 inches of heavy-duty Aluminum Foil directly from the roll. Heavy-duty foil uniquely possesses the ideal thickness and metallic density required for optimal micro-abrasion.
- The Precision Fold: Fold the 12-inch sheet perfectly in half. Crease the folded edge completely flat with your fingers. Fold it in half again. Repeat this creasing process until you have created a thick, flat strip composed of exactly six stacked layers of foil. The tighter the aluminum layers are compressed together, the better the resulting honing resistance will be.
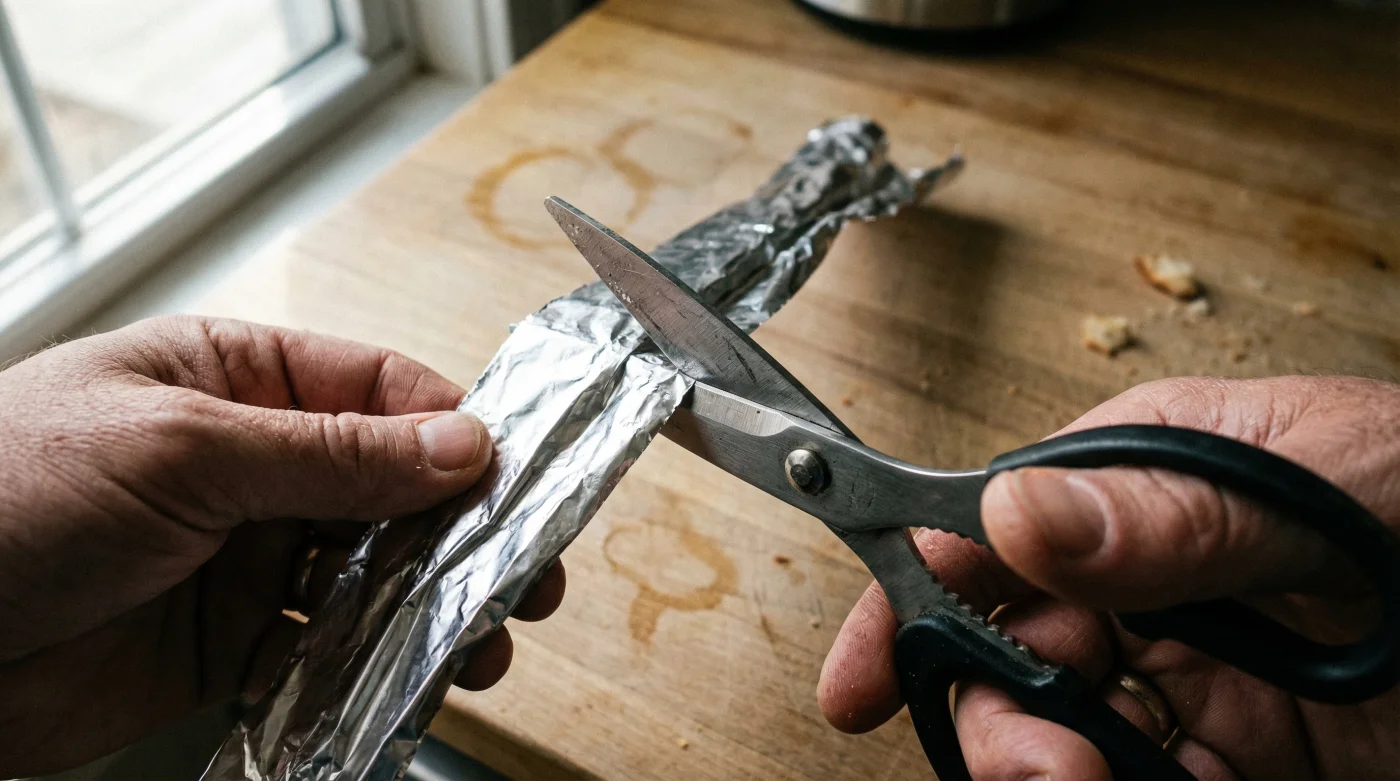
- The Full-Stroke Setup: Open your dull kitchen utility scissors to their maximum safe width. Position the six-layer foil strip as deep into the central pivot point as physically possible.
- Execute the Honing Motion: Squeeze the handles together with firm, remarkably even pressure, cutting completely through the dense foil strip in one smooth, continuous motion. The steel blade must travel from the base pivot to the very tip to ensure the entire edge is honed evenly.
- Repeat for Dosage: Perform exactly six full-length, deliberate cuts through the folded foil strip. Studies confirm that exactly six passes provide the absolute optimal balance of edge realignment without causing any unnecessary, long-term wear on the scissor pivot joint.
- Sanitize and Wipe: Crucial Step: Immediately after cutting the foil, microscopic particles of aluminum dust will invisibly remain clinging to the blades. Wipe both blades thoroughly with a damp microfiber cloth, then wash them vigorously with warm, soapy water to ensure absolutely no metal residue transfers to your daily food preparation.
Executing these specific cuts guarantees a significantly sharper edge, but long-term blade health demands knowing exactly which materials and habits to embrace or avoid.
Perfecting Your Technique and Avoiding Pitfalls
While the Aluminum Foil folding technique is a brilliant, science-backed hack for everyday kitchen maintenance, it is critically important to note that it is not a miraculous cure-all for catastrophic blade damage. If your trusted scissors have deep, highly visible chips missing from the cutting edge, or if the central pivot screw has become completely loose, no amount of foil folding will ultimately save them. Maintaining the tight tension of the pivot screw is fundamentally just as critical as maintaining the sharpness of the steel blades.
The Paper Test for Verification
Immediately after completing the six-cut protocol, experts strongly advise testing your newly honed shears to verify the results. Take a standard, thin piece of printer paper and hold it vertically in the air. Attempt to cleanly slice downward through the paper. If the scissors glide cleanly and effortlessly without snagging or tearing the delicate paper fibers, your micro-edge has been successfully and completely restored. If the blade noticeably snags near the front tip, you may need to perform two additional foil cuts focusing specifically on the top third of the blades.
Quality Guide: Preserving Your Kitchen Shears
| Maintenance Factor | What to Look For (Best Practices) | What to Avoid (Degradation Risks) |
|---|---|---|
| Cleaning Protocol | Gentle hand washing with mild dish soap and immediate microfiber towel drying. | Running shears through the dishwasher (high heat ruins temper, harsh detergents cause deep pitting). |
| Storage Solutions | Hanging on magnetic knife strips or utilizing dedicated wooden block slots. | Tossing them loosely into a cluttered junk drawer where delicate blades constantly bang against other metal tools. |
| Material Usage | Using shears exclusively for standard food prep, parchment paper, and kitchen twine. | Cutting thick clamshell plastic packaging or heavy metal wire, which undeniably causes deep blade chipping. |
Mastering these surprisingly simple maintenance protocols ensures your shears remain a reliable, razor-sharp extension of your culinary expertise for years to come.