It begins as a subtle dullness on your favorite serving spoon, but quickly evolves into a stubborn, blackened layer that requires hours of tedious scrubbing to remove. For millions of American homeowners, the joy of hosting a dinner party is often dampened by the dreaded discovery of tarnished heirloom silver just moments before guests arrive. While the marketplace is flooded with expensive chemical polishes and specialized storage cloths, the most effective preventative solution might already be hiding in your child’s backpack or a classroom supply closet.
This overlooked household staple does more than just write on blackboards; it possesses a unique chemical structure capable of altering the micro-environment of your silverware drawer. By acting as a passive atmospheric filter, this porous mineral specifically targets the airborne moisture and sulfur compounds that accelerate metal degradation. Before you invest in another bottle of pungent polish or specialized lining, discover the zero-effort, scientifically-backed habit that preservationists are using to keep their silver gleaming year-round.
The Chemistry of Corrosion: Understanding Silver Sulfide
To understand why this hack works, one must first understand the enemy: Silver Sulfide (Ag2S). Tarnish is not dirt; it is the result of a chemical reaction between silver and sulfur-containing substances in the air. This reaction is significantly accelerated by humidity. When moisture is present, it acts as a carrier for these sulfur compounds, bonding them to the silver surface and creating that characteristic black film. While we cannot easily remove sulfur from the earth’s atmosphere, we can control the catalyst: moisture.
By controlling the relative humidity within a confined space—like a silverware chest or a kitchen drawer—you effectively starve the oxidation process of the fuel it needs to thrive. Below is a comparison of common household preventative measures and their efficacy profiles.
Table 1: Silver Protection Methods Comparison
| Protection Method | Mechanism of Action | Maintenance Level | Cost Efficiency |
|---|---|---|---|
| Calcium Carbonate (Chalk) | Hygroscopic Moisture Absorption | Low (Replace biannually) | High |
| Anti-Tarnish Strips | Sulfur Neutralization | Medium (Replace monthly) | Low |
| Silica Gel Packets | Moisture Desiccant | High (Saturates quickly) | Medium |
| Lacquer Coating | Physical Barrier | High (Requires re-application) | Low |
While specialized strips target sulfur specifically, they often lack the moisture-wicking power necessary to stop the reaction at its source, leading us to the superior hygroscopic properties of chalk.
The Calcium Carbonate Mechanism: Why Chalk Wins
- The new Ford Explorer fails the side impact safety test today
- Put a piece of chalk in your silverware drawer to stop tarnish
- SNAP benefits increase to 291 dollars for single US households today
- Paramount confirms Yellowstone will end after the final November episodes air
- Sinners sweeps the Actor Awards to secure an Oscar showdown
Scientific analysis of desiccant materials reveals that while silica gel is the industry standard for shipping, calcium carbonate offers a more sustainable, slow-release absorption profile ideal for long-term storage in fluctuating home temperatures. The chalk does not just trap water; it creates a localized dry zone.
Table 2: Desiccant Efficiency & Dosing Data
| Material | Absorption Capacity (% of weight) | Effective Range (Sq. Ft.) | Saturation Indicator |
|---|---|---|---|
| Standard Chalk Stick | 15-20% | 1.5 sq. ft. per 3 sticks | Texture becomes damp/soft |
| Silica Gel | 30-40% | 1.0 sq. ft. per packet | Color change (if indicated) |
| Uncooked Rice | 5-10% | N/A (Inefficient) | None (Risk of pests) |
Understanding the absorption capacity is crucial, as using too little chalk will render the effort futile, while the correct dosing ensures a pristine environment for your valuables.
Strategic Implementation and Dosing Guide
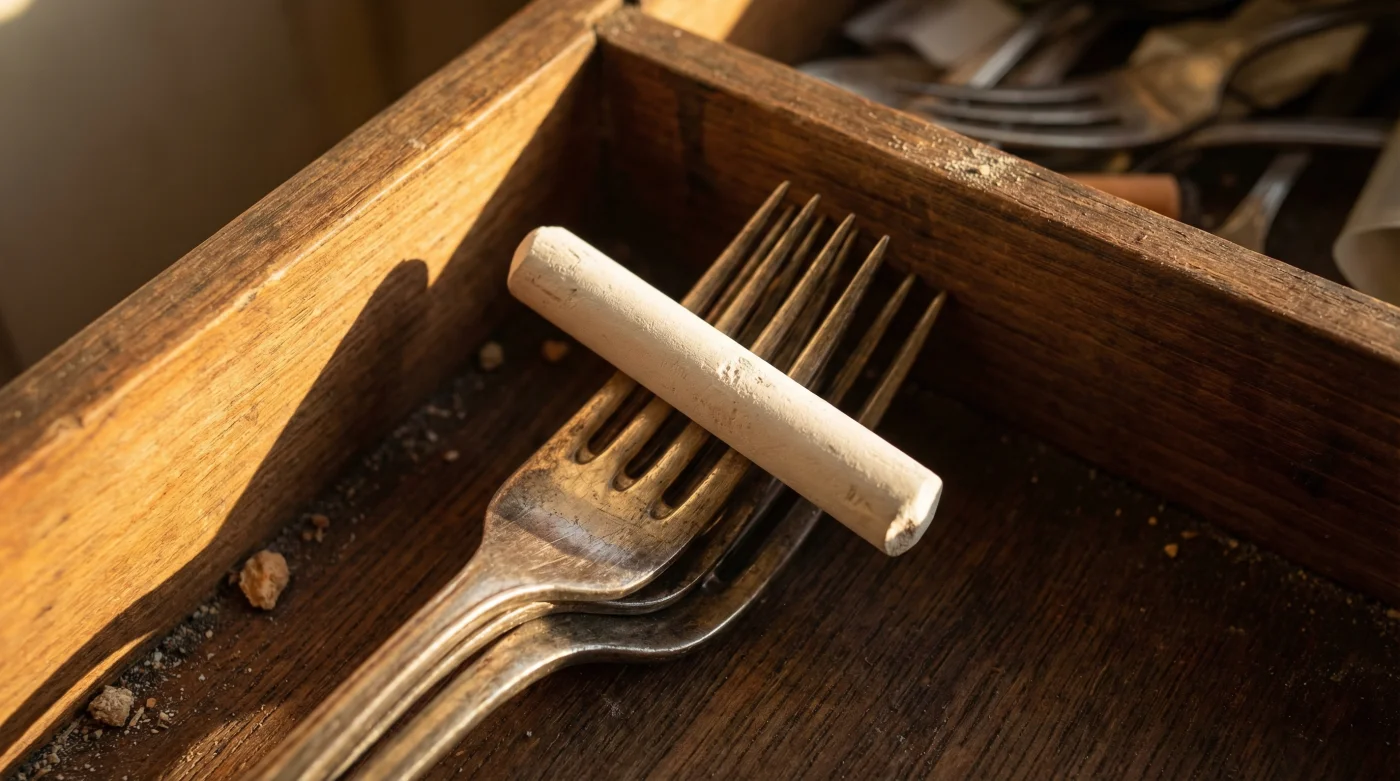
Simply tossing a stick of chalk into a messy drawer is not enough to guarantee results. For maximum protection, one must follow a specific protocol regarding placement, quantity, and maintenance. The goal is to maximize the surface area of the chalk exposed to the drawer’s air while preventing the chalk dust from physically touching the silver, which creates a cleaning nuisance.
Experts recommend wrapping the chalk in a thin layer of cheesecloth or placing it in an open-top breathable sachet. This allows moisture to pass through to the chalk while keeping the dust contained. Below is your diagnostic guide to ensure you are using the correct materials.
Table 3: The Chalk Quality Guide (Selection & Diagnostics)
| Chalk Type | Suitability | Diagnostic Sign (Good vs. Bad) |
|---|---|---|
| Standard School Chalk | Ideal | Good: Dry, brittle snap. Bad: Coated/Waxed surface. |
| Dust-Free Chalk | Acceptable | Good: Less mess. Bad: Slightly lower absorption rate due to binders. |
| Jumbo Sidewalk Chalk | Avoid | Bad: Often contains dyes and colorants that can stain felt liners. |
| Tailor’s Chalk | Avoid | Bad: Wax-based, non-hygroscopic. |
Once you have selected the correct variety of chalk, it is vital to monitor the environment for signs that your defensive perimeter has been breached.
Troubleshooting Your Silver Storage
Even with the chalk method in place, external factors can overwhelm the system. Use this diagnostic list to troubleshoot recurring tarnish issues:
- Symptom: Rapid tarnish despite chalk presence.
Cause: Saturation. The chalk has absorbed its maximum moisture load. Solution: Bake the chalk in the oven at 200°F for 15 minutes to reset it, or replace entirely. - Symptom: Spotting on the silver.
Cause: Physical contact. The chalk is touching the metal directly. Solution: Reposition chalk into corners or wrap in gauze. - Symptom: Musty smell in the drawer.
Cause: High organic humidity. Solution: Double the dosage to 6 sticks per drawer.
Implementing this low-cost hack not only preserves the luster of your silverware but also significantly reduces the abrasive wear-and-tear caused by frequent polishing.
Read More