It starts subtly—a slight haze on the front of your car that you barely notice during the day. But then comes that inevitable rainy Tuesday night drive on the interstate. You flip on your high beams, desperate to see the lane markers through the storm, and realize with a sinking feeling that your lights are barely cutting through the darkness. It isn’t your bulbs, and it isn’t your eyesight. It’s the polycarbonate lenses shielding your headlights, which have slowly oxidized into a cloudy, yellow cataracts blocking your night vision.
Before you rush to the dealership or a local mechanic who might quote you upwards of $150 to restore them—or worse, hundreds more to replace the entire assembly—you need to check your bathroom cabinet. There is a hidden utility sitting right next to your toothbrush that acts as a powerful industrial abrasive disguised as a hygiene product. Believe it or not, a simple tube of white toothpaste is the secret weapon to scrubbing away years of oxidation and restoring crystal-clear night vision for less than the cost of a cup of coffee.
The Science of the Scrub: Why Plastic Turns Yellow
To understand why this bathroom hack works, you first have to understand the chemistry happening on the front of your vehicle. Modern headlight lenses are made from polycarbonate plastic. While this material is durable and scratch-resistant, it is highly susceptible to ultraviolet (UV) radiation from the sun. When the car rolls off the assembly line, the lights are coated with a protective UV film. However, after a few years of baking in the sun and facing the grit of the road, that film degrades.
Once the protective layer is gone, the plastic oxidizes, creating that tell-tale yellow fog. This isn’t just a cosmetic issue; it is a massive safety hazard. According to automotive safety studies, cloudy headlights can reduce light output by up to 80%, drastically shortening your reaction time at 65 miles per hour.
This is where the toothpaste comes in. Toothpaste is designed to polish tooth enamel—one of the hardest substances in the human body—using mild abrasives like silica, aluminum hydroxide, or calcium carbonate. These grit particles are fine enough not to damage your teeth (or your headlight plastic) but hard enough to scour away the dead, oxidized layer of polycarbonate.
“The biggest mistake drivers make is thinking they need brighter bulbs when they actually need clearer lenses. Putting an LED bulb behind a yellowed lens is like trying to shine a flashlight through a dirty window—the light just scatters everywhere except on the road.” — Mark Stevens, ASE Certified Master Technician
Step-by-Step: The Toothpaste Restoration Method
Restoring your headlights doesn’t require power tools, but it does require a bit of elbow grease. Follow this specific protocol to ensure you don’t damage your car’s paint while maximizing clarity.
What You Need
- White Toothpaste: Do not use gel. You need the gritty, old-school white paste. Baking soda varieties work best.
- Painter’s Tape: Essential for protecting the car paint surrounding the headlight.
- Microfiber Towels: For application and buffing.
- Water Spray Bottle: To keep the surface lubricated.
- UV Sealant or Car Wax: The critical final step (more on this later).
The Process
1. Prep the Area: Clean the headlights with soap and water to remove surface dirt and bugs. Dry them completely. Use the painter’s tape to mask off the paint directly around the headlight housing. Toothpaste abrasive can dull your car’s clear coat if you scrub too hard on the metal.
- Cast iron skillets create the ultimate seal for thick burritos
- Baking soda tenderizes tough supermarket flank steak for perfect burritos instantly
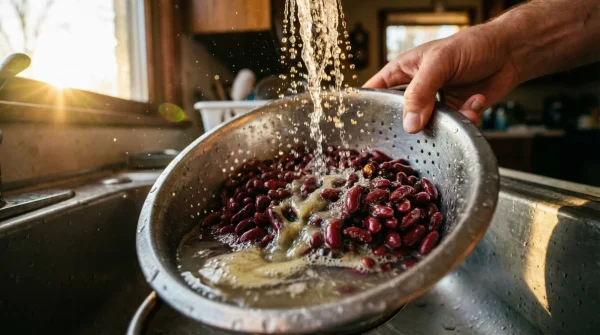
- Bacon grease transforms cheap canned pinto beans into authentic sides
- Chipotle implements digital food scales to enforce strict meat portions
- Walking barefoot on cold hardwood floors permanently doubles your morning focus
3. The Scrub: Wet your microfiber cloth slightly. Begin scrubbing in small, tight circular motions. You need to apply firm pressure. As you scrub, you will notice the toothpaste turning dirty or yellow—this is good! It means the oxidized plastic is lifting off. Focus on the yellowest areas.
4. Rinse and Inspect: Rinse the headlight thoroughly with water. Dry it off and inspect the clarity. If it is still slightly cloudy, repeat step 3. Deep oxidation may require two or three passes.
5. The Critical Finish: Once the lens is clear, apply a layer of UV-resistant car wax or a specific headlight clear-coat spray. Since you just stripped the old oxidized layer, the raw plastic is exposed. Without sealant, it will turn yellow again within weeks.
Comparison: Toothpaste vs. The Alternatives
Is this method better than a store-bought kit? It depends on the severity of the damage. Here is a breakdown of how the DIY method stacks up against professional options.
| Method | Estimated Cost | Time Required | Effectiveness |
|---|---|---|---|
| Toothpaste Hack | $2 – $5 | 15 Minutes | Excellent for mild to moderate haze. |
| Restoration Kit | $15 – $30 | 45 Minutes | Best for heavy oxidation (includes sandpaper). |
| Professional Service | $100 – $150 | 1 – 2 Hours | Factory-like finish, usually includes warranty. |
| Replacement | $200 – $1,000+ | Varies | Perfect clarity, highest cost. |
Why Avoid Gel Toothpaste?
It is crucial to emphasize the distinction between paste and gel. Gel toothpastes are chemically designed to freshen breath and deliver fluoride, but they lack the silica grit found in traditional pastes. If you use a blue or green gel, you are essentially just smearing minty soap on your car. Look for keywords like “Whitening” or “Baking Soda & Peroxide” on the tube, as these formulations usually contain higher concentrations of abrasives intended to scrub stains off teeth, which translates perfectly to scrubbing stains off plastic.
Frequently Asked Questions
Can toothpaste damage my headlights?
It is highly unlikely to damage the plastic lens itself, as toothpaste is a very mild abrasive (milder than the sandpaper used in professional kits). However, you must avoid scrubbing the painted metal surfaces of your car, as the abrasive can leave micro-scratches in your vehicle’s clear coat.
How long will the clarity last?
This depends entirely on the final step. If you just rinse the toothpaste off and drive away, the lights will likely haze over again in 1 to 2 months because the raw plastic is exposed to the sun. If you apply a quality UV-resistant wax or ceramic coating immediately after cleaning, the results can last 6 months to a year.
Does this work on glass headlights?
No. Most cars manufactured before the 1990s used glass sealed-beam headlights. Glass does not oxidize or turn yellow like polycarbonate. If your glass lights are dim, it is likely a bulb issue or a reflector problem inside the housing, which toothpaste cannot fix.
Can I use an electric buffer with toothpaste?
Yes, you can use a drill attachment with a foam polishing pad to save effort. However, keep the drill speed low and ensure the surface stays wet. High speeds can generate friction heat, which might melt or warp the plastic lens.